Tutorial
Step-by-step guides to set up and master your OpenClaw agent on ClawBase — from your first login to advanced configuration.
ClawBase is a platform that gives you your own AI agent — a fully autonomous assistant running in a private virtual machine. Your agent can chat, browse the web, manage files, connect to messaging apps, and remember everything across conversations. This guide walks you through the dashboard and shows you how to interact with your agent for the first time.
The ClawBase dashboard — what you are looking at
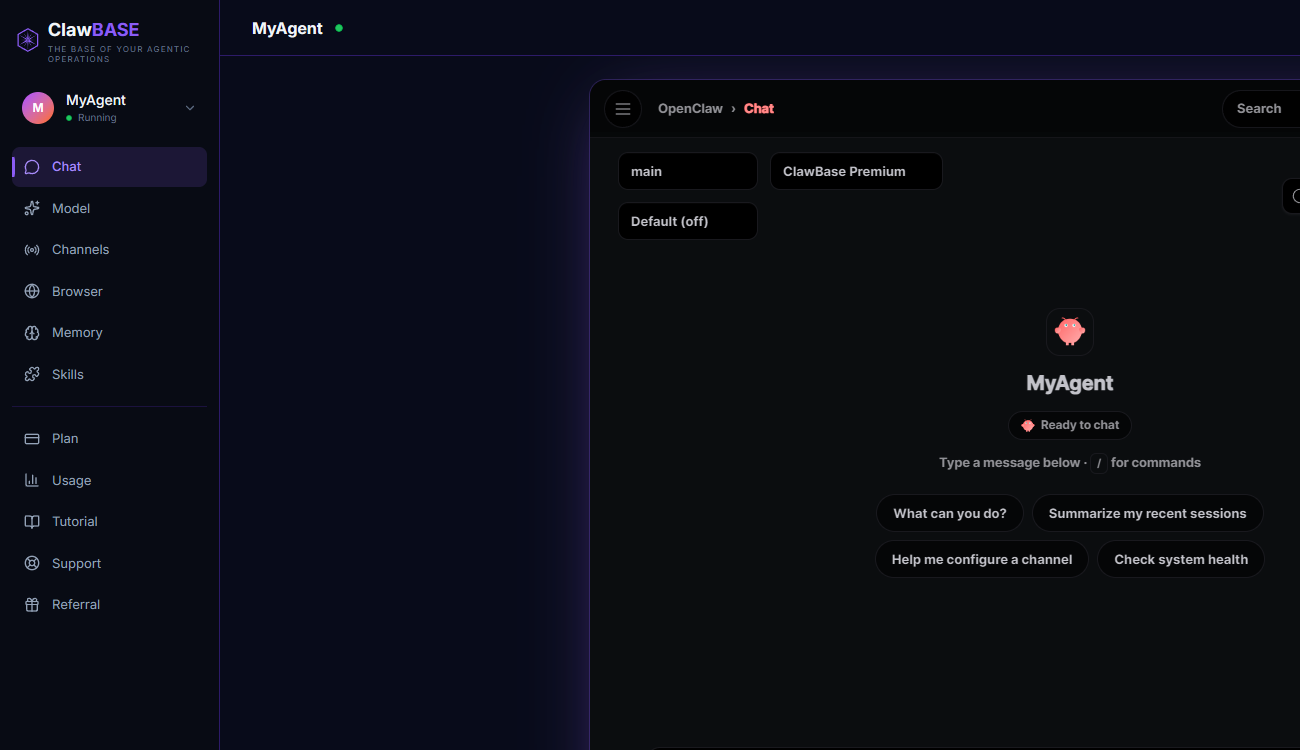
When you open your agent's page, you see the main dashboard. On the left is the sidebar (1) with all the features: Chat, Model, Channels, Browser, Memory, Skills, and more. At the top is the top bar (2) showing your agent's name and status dot. In the center is the main content area (3) — right now showing the Chat interface.
Understanding your agent's status
Next to your agent's name at the top of the page, you will see a small colored dot (1). A green dot means your agent is online and ready to work. A yellow dot means it is starting up or processing something. If you see no dot, your agent may be offline — see the Troubleshooting section for help.

Send your first message
Click on the Chat tab in the sidebar (it should already be selected). At the bottom of the screen you will see a text input (1) that says "Message [YourAgent] (Enter to send)". Click on it, type a message like "Hello, what can you do?" and press Enter to send.

Try asking something specific like "Write me a short poem about clouds" to see its creative capabilities.
Top bar actions — restart, reinstall, update, backup, delete
The top-right corner has action buttons (1) for managing your agent. From left to right: the clockwise arrow reboots your agent's VM (~2 min downtime). The refresh icon reinstalls the agent from scratch. The up arrow checks for updates. The counter-clockwise arrow restores from a backup. The trash icon deletes the agent permanently.

Rebooting interrupts running tasks but preserves all data. Reinstalling destroys the VM and creates a fresh one. Delete is permanent.
Channels — connect Telegram, WhatsApp, or Discord
The Channels tab (1) lets your agent communicate through messaging platforms. Once connected, anyone who messages your Telegram bot or WhatsApp number will be talking to your AI agent. See the dedicated Telegram and WhatsApp sections of this tutorial for step-by-step setup.
Model — choose your agent's AI brain
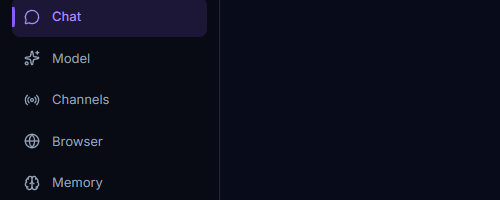
The Model tab (1) lets you pick which AI model your agent uses. Claude Sonnet is fast and efficient for everyday tasks. Claude Opus is the most capable for complex reasoning. You can also enable web search so your agent can look up current information.
Memory — give your agent persistent knowledge
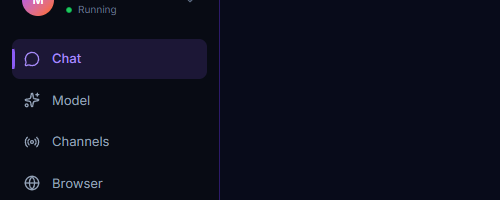
The Memory tab (1) configures your agent's long-term memory. Without memory, it forgets everything after each conversation. With it, your agent remembers your preferences, past decisions, and important facts forever. See the Memory section for details.
Skills — add specialized capabilities
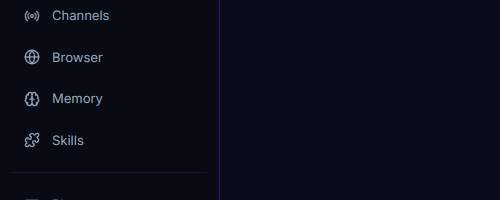
The Skills tab (1) lets you install tool packages from ClawHub. Skillsets bundle 21-24 tools designed for specific roles (Software Engineer, Sales, Marketing, etc.). Once installed, your agent can use these tools automatically when relevant.

Browser — let your agent control a web browser
The Browser tab (1) gives your agent two ways to browse the web. By default, a built-in Browser Harness is ready with no setup. You can also switch to Browser Relay, which lets the agent control your own Chrome via an extension — useful when it needs access to your logged-in sessions.
Usage — monitor token consumption and resources
The Usage tab (1) shows how much your agent is consuming: LLM tokens (session and weekly limits), memory storage (per-component breakdown), and VM resources (CPU, RAM, disk). This helps you stay within plan limits and optimize usage.
Getting Started
Your first steps with ClawBase
ClawBase is a platform that gives you your own AI agent — a fully autonomous assistant running in a private virtual machine. Your agent can chat, browse the web, manage files, connect to messaging apps, and remember everything across conversations. This guide walks you through the dashboard and shows you how to interact with your agent for the first time.
The ClawBase dashboard — what you are looking at
When you open your agent's page, you see the main dashboard. On the left is the sidebar (1) with all the features: Chat, Model, Channels, Browser, Memory, Skills, and more. At the top is the top bar (2) showing your agent's name and status dot. In the center is the main content area (3) — right now showing the Chat interface.
Understanding your agent's status
Next to your agent's name at the top of the page, you will see a small colored dot (1). A green dot means your agent is online and ready to work. A yellow dot means it is starting up or processing something. If you see no dot, your agent may be offline — see the Troubleshooting section for help.
Send your first message
Click on the Chat tab in the sidebar (it should already be selected). At the bottom of the screen you will see a text input (1) that says "Message [YourAgent] (Enter to send)". Click on it, type a message like "Hello, what can you do?" and press Enter to send.
Top bar actions — restart, reinstall, update, backup, delete
The top-right corner has action buttons (1) for managing your agent. From left to right: the clockwise arrow reboots your agent's VM (~2 min downtime). The refresh icon reinstalls the agent from scratch. The up arrow checks for updates. The counter-clockwise arrow restores from a backup. The trash icon deletes the agent permanently.
Channels — connect Telegram, WhatsApp, or Discord
The Channels tab (1) lets your agent communicate through messaging platforms. Once connected, anyone who messages your Telegram bot or WhatsApp number will be talking to your AI agent. See the dedicated Telegram and WhatsApp sections of this tutorial for step-by-step setup.
Model — choose your agent's AI brain
The Model tab (1) lets you pick which AI model your agent uses. Claude Sonnet is fast and efficient for everyday tasks. Claude Opus is the most capable for complex reasoning. You can also enable web search so your agent can look up current information.
Memory — give your agent persistent knowledge
The Memory tab (1) configures your agent's long-term memory. Without memory, it forgets everything after each conversation. With it, your agent remembers your preferences, past decisions, and important facts forever. See the Memory section for details.
Skills — add specialized capabilities
The Skills tab (1) lets you install tool packages from ClawHub. Skillsets bundle 21-24 tools designed for specific roles (Software Engineer, Sales, Marketing, etc.). Once installed, your agent can use these tools automatically when relevant.
Browser — let your agent control a web browser
The Browser tab (1) gives your agent two ways to browse the web. By default, a built-in Browser Harness is ready with no setup. You can also switch to Browser Relay, which lets the agent control your own Chrome via an extension — useful when it needs access to your logged-in sessions.
Usage — monitor token consumption and resources
The Usage tab (1) shows how much your agent is consuming: LLM tokens (session and weekly limits), memory storage (per-component breakdown), and VM resources (CPU, RAM, disk). This helps you stay within plan limits and optimize usage.
Telegram
Connect your agent to Telegram
Telegram is a messaging app (like WhatsApp or iMessage) that supports bots — automated accounts that can send and receive messages. By connecting your ClawBase agent to Telegram, anyone who messages your bot will be talking to your AI agent. This is the easiest channel to set up and takes about 5 minutes.
What are channels and why does your agent need one?
Right now, you can only talk to your agent through the ClawBase dashboard. But what if you want to message it from your phone while commuting? Or let a colleague interact with it? Channels solve this by connecting your agent to messaging platforms like Telegram, WhatsApp, and Discord. Once connected, your agent automatically reads and responds to messages on that platform — just like texting a friend.
Install Telegram (if you do not have it yet)
If you do not already have Telegram, download it for free from the App Store (iPhone) or Google Play (Android). You can also use Telegram on your computer at web.telegram.org or by downloading the desktop app. You will need a phone number to create an account.
Find @BotFather on Telegram
Open Telegram and use the search bar at the top to search for "@BotFather". BotFather is Telegram's official tool for creating bots — it is a special Telegram account run by Telegram itself. Tap on the result that has a blue checkmark (verified) and says "BotFather" with the description "official".
Start a conversation with BotFather
Once you open the BotFather chat, tap the "Start" button at the bottom of the screen (or type /start and send it). BotFather will respond with a welcome message and a list of available commands.
Create a new bot by sending /newbot
Type /newbot and send it. BotFather will ask you two questions: first, what to call your bot (this is the display name that people will see), and second, what username to give it (this must be unique and end in "bot", for example "MyClaw_bot").
Choose a name and username for your bot
First, BotFather asks for a display name. Type something friendly like "My ClawBase Agent" or "Office Assistant". Then it asks for a username — this must end in "bot" (for example: "MyClawAgent_bot" or "OfficeHelper_bot"). If the username is already taken, try adding numbers or underscores.
Copy your bot token
After you create the bot, BotFather will send you a congratulations message containing your "bot token" (1). It looks like a long string of numbers and letters separated by a colon. This is your bot's secret password. Select the entire token and copy it.
Go to the Channels tab in ClawBase and select Telegram
Switch back to your ClawBase dashboard. Click on "Channels" in the left sidebar. You will see cards for Telegram, WhatsApp, and Discord. Click on the Telegram card (1) to select it. You will see a setup wizard with three steps: Bot linking, Bot pairing, and Telegram connected.
Paste your bot token and continue
In Step 1 (Bot linking), paste the token you copied from BotFather into the token field (Ctrl+V on PC, or long-press and Paste on mobile). Then click the Continue button. ClawBase will verify the token with Telegram and push the configuration to your agent.
Get the pairing code from your bot
In Step 2 (Bot pairing), you need to link your Telegram account to the bot. Open Telegram, search for your bot by its username (e.g. @MyClawBaseAgent_bot), and send it /start. The bot will reply with a pairing code (1) that looks like "openclaw pairing approve telegram XXXXXXXX". Copy the entire reply message.
Paste the pairing code in ClawBase and approve
Switch back to ClawBase. In the Bot pairing step, paste the entire reply from your bot into the text field (1). You should see something like "openclaw pairing approve telegram 3UUPE3RD". Click the Approve button (2) to complete the pairing. ClawBase will verify the code and connect your Telegram account.
Verify the connection and send a test message
Once paired, the Telegram card will show a green "Active" status and "Your bot is live and receiving messages" (1). Now send your bot a message like "Hello!" on Telegram. Your agent will respond within a few seconds. Congratulations — your agent is now reachable on Telegram!
Connect your agent to WhatsApp
WhatsApp works differently from Telegram — instead of creating a separate bot, you link your existing WhatsApp account as a "linked device". This means your agent can send and receive messages using your own WhatsApp number. People message you as they normally would, and your agent handles the replies.
How WhatsApp linking works
Unlike Telegram where you create a separate bot account, WhatsApp uses a "linked device" system. This is the same technology that powers WhatsApp Web and WhatsApp Desktop — it lets another device access your WhatsApp account. Your ClawBase agent becomes one of these linked devices, able to read and send messages on your behalf.
Go to Channels and click the WhatsApp card
In the ClawBase sidebar, click "Channels". Then click the WhatsApp card. You will see a setup wizard with three steps: Bot linking, Bot pairing, and WhatsApp connected. The first step offers two pairing methods: "Phone number code" (1) and "QR code" (2).
Choose your pairing method
You have two options. "Phone number code" lets you type an 8-character code into WhatsApp on your phone — no camera needed. "QR code" lets you scan a code with your phone camera, which is faster if you are at your computer. We recommend the phone number code method as it works from any device.
(Code method) Enter your phone number
Click "Phone number code". Enter your WhatsApp phone number in international format with country code (e.g. +1 555 123 4567). Click "Get code" (1). ClawBase will generate an 8-character pairing code.
(Code method) Enter the code on your phone
ClawBase will display a pairing code on screen (1). On your phone, open WhatsApp, go to Settings, then "Linked Devices", then "Link a Device". Tap "Link with phone number instead" and enter the code shown on your ClawBase screen. The code expires in about 45 seconds, so be quick.
(QR method) Scan the QR code with your phone
If you chose the QR Code method instead, a QR code will appear on screen (1). On your phone, open WhatsApp, go to Settings, then "Linked Devices", then tap "Link a Device". Your phone camera will open — point it at the QR code on your screen. The pairing will happen automatically.
On your phone: open the three-dot menu
Open WhatsApp on your phone. Tap the three dots icon (⋮) at the top right corner. A menu will appear with several options. Look for "Linked devices" (1) and tap it.
Tap "Link a device"
You will see the Linked Devices screen showing how many devices are currently linked (e.g. "0 of 4 devices linked"). Tap the "Link a device" button (1). Your phone may ask for biometric authentication (fingerprint or face) before proceeding.
Scan the QR code or enter the pairing code
Your phone will open a QR scanner. If you chose the QR method in ClawBase, point your camera at the QR code on screen. If you chose the phone number code method, tap "Link with phone number instead" (1) at the bottom and enter the 8-character code from ClawBase.
Message your bot and get the pairing code
Open WhatsApp and find your ClawBase bot in your chats (it will be named "ClawBASE" or your agent's name). Send it any message like "Hi". The bot will reply with an "OpenClaw: access not configured" message containing your phone number, a pairing code (1), and approval instructions. Copy the entire reply message — you will paste it in ClawBase next.
Paste the pairing reply and approve
Switch back to ClawBase. Step 1 (Bot linking) now shows a green checkmark. Step 2 (Bot pairing) is active and shows instructions. Open WhatsApp, message your bot, and it will reply with a pairing code. Copy the bot's entire reply and paste it into the text field (1). Then click the Approve button (2). ClawBase will verify the code and connect your WhatsApp account.
Verify the connection
Once pairing completes, all three steps will show green checkmarks. The WhatsApp connected section (1) will display "Your bot is live and receiving messages" with a Running badge and a Deactivate button. Now ask a friend to send a message to your WhatsApp number, or send one yourself from another phone. Your agent will receive it and respond automatically.
Discord
Connect your agent to Discord
Discord uses bots — dedicated accounts that live inside a server and can read and respond to messages. Unlike WhatsApp (which links your existing account), Discord requires you to create a bot application through the Discord Developer Portal, then invite it to your server. Once connected, your ClawBase agent reads messages sent to the bot and replies automatically.
How Discord bots work
Discord bots are special accounts created through the Discord Developer Portal. Each bot gets a unique token (like a password) that lets your ClawBase agent control it. You create the bot, give ClawBase its token, then invite the bot to a Discord server. Anyone who DMs the bot or mentions it in a channel will be talking to your AI agent.
Go to Channels and click the Discord card
In the ClawBase sidebar, click "Channels". Then click the Discord card (the one with the # icon). You will see a three-step setup wizard: Bot linking (1), Bot pairing (2), and Discord connected (3). The first step shows detailed instructions for creating your bot on the Discord Developer Portal.
Open the Discord Developer Portal
Open a new browser tab and go to discord.com/developers/applications. Log in with your Discord account (create one for free if you do not have one). You will see the Applications page with your existing apps (if any) and a red "New Application" button (1) in the top right.
Create a new application
Click the "New Application" button. A dialog appears asking for a name (1). Type a name for your bot (for example, "My ClawBase Agent"). Check the terms of service checkbox and click the "Create" button (2). You will be taken to the application's settings page.
Create the bot and copy its token
In the left sidebar of the Developer Portal, click "Bot" (1). You will see your bot's username and icon. Scroll down to the Token section and click "Reset Token" (2), then confirm with "Yes, do it!". A new token will appear — click "Copy" to copy it to your clipboard. This token is shown only once, so do not close the page until you have pasted it in ClawBase.
Paste the token in ClawBase and click Continue
Switch back to ClawBase. In the Bot linking step, paste your bot token into the input field (1). The token appears as dots for security. Then click the Continue button (2). ClawBase will verify the token and connect to your bot.
Enable Message Content Intent
Go back to the Developer Portal and navigate to the Bot settings page. Scroll down to the "Privileged Gateway Intents" section. Toggle on "Message Content Intent" (1) — this allows your bot to read the actual text of messages. Without it, the bot cannot see what people type. The toggle should turn blue when enabled.
Invite the bot to your server
In the Developer Portal sidebar, click "OAuth2". Scroll down to "OAuth2 URL Generator". Check the "bot" scope, then select "Send Messages" and "Read Message History" under Bot Permissions. Copy the Generated URL (1) at the bottom and open it in your browser. Select the server you want to add the bot to and click "Authorize".
DM your bot on Discord to get the pairing code
Open Discord and find your bot in the member list of the server you invited it to. Right-click the bot and select "Message" to open a direct message. Send any message (like "hello"). The bot will reply with a pairing code — a message that starts with "openclaw pairing approve discord" followed by a code. Copy this entire reply.
Paste the pairing code and approve
Switch back to ClawBase. Step 1 (Bot linking) now shows a green checkmark (1). In the Bot pairing step, paste the bot's reply into the text field (2). Click the Approve button (3) to complete the pairing. ClawBase will verify the code and finalize the connection.
Verify the connection
Once paired, all three steps show green checkmarks. The Discord connected step displays "Your bot is live and receiving messages" with a green Running badge (1) and a Deactivate Discord button. Send your bot a DM on Discord to test — your agent should reply within a few seconds. Congratulations, your agent is now on Discord!
Memory
Give your agent persistent knowledge
Without memory, your AI agent forgets everything the moment a conversation ends — like talking to someone with amnesia. The Memory Stack gives your agent the ability to remember facts, preferences, past conversations, and important documents across all its interactions. This is what transforms a simple chatbot into a truly useful long-term assistant.
Why memory matters
Imagine hiring an assistant who forgets your name every time you talk to them. That is what an AI agent without memory is like. With the Memory Stack, your agent remembers: your name and preferences, key facts from past conversations, important documents you share, decisions you have made, and the full history of every conversation. All of this happens automatically — you do not need to remind your agent of anything.
Navigate to the Memory tab
Click "Memory" in the left sidebar. You will see the Memory configuration page. At the top is a PRO badge (1) confirming this is a premium feature. Below that is a row of four stack options under "TYPE OF WORK" (2). The currently selected stack's components are shown in three cards below (3). A green "Active" indicator in the top-right confirms the stack is running.
Choose a type of work
Under "TYPE OF WORK" you will see four stack buttons: Generic (1) with Journal + Lossless Claw (selected by default, shown in purple), Technical (2) with Mem0 + QMD search, Marketing (3) with Cognee knowledge graph, and Executive (4) with Graphiti temporal graph. Each is optimized for a different type of work. Generic works well for most users. Technical is best for developers. Marketing suits creative and content work. Executive is ideal for business and project management.
Understand the three memory layers
Below the stack selector, three cards show the layers of your active stack. Daily (1) — "Today's working memory" — is captured during conversation and re-read on every reply (stored as YYYY-MM-DD.md files). Long-term (2) — "Durable facts and preferences" — is promoted from daily notes on a nightly schedule. Recall (3) — "Compressed history" — uses Lossless Claw, continuously summarized and consulted when older context is needed. Each layer shows a green "Active" badge.
Activate a stack
If no stack is active yet, click the stack you want and then click the "Activate" button (1) at the bottom. The installation process takes 2-5 minutes. Once done, the button changes to "Stack active" (greyed out) and each component shows a green "Active" badge.
How your agent uses memory automatically
Once the memory stack is active, your agent automatically: saves key facts from every conversation into daily notes, promotes important information to long-term memory on a nightly schedule, compresses older conversations into searchable summaries via Lossless Claw, and recalls relevant information before generating each response. You do not need to tell it to "remember" things — it does this by default.
Monitor memory usage
Go to the Usage tab in the sidebar, then click the "Memory" sub-tab (1). You will see the Memory Stack status showing active tools (native, lossless-claw). Below that, a Memory Storage bar (2) shows total usage against your budget (e.g. 161.6 MB / 7.82 GB). Further down, the Memory Storage Breakdown lists per-component storage (Skills Files, Graphiti + Neo4j, etc.).
Nightly maintenance happens automatically
Every day at 3 AM, ClawBase automatically runs maintenance on all memory tools: daily notes are promoted to long-term memory, knowledge graphs are rebuilt, and indexes are updated. You do not need to do anything — this is fully automatic.
Skillsets
Add capabilities to your agent
Out of the box, your agent can chat and think — but it cannot do things like search GitHub, scrape websites, analyze data, or manage spreadsheets. Skillsets are pre-packaged bundles of tools from ClawHub that give your agent specific capabilities. Think of them like app stores for your AI — each skillset is designed for a specific role (CEO, Developer, Marketer, etc.) and bundles 21-24 proven tools.
What are skillsets?
A skillset is a curated package of AI tools designed for a specific role. For example, the "Software Engineer" skillset includes Self-Improving, GitHub CLI Integration, Proactive Agent, Agent Browser Clawdbot, and Skill Creator — plus 18 more tools. The "Sales" skillset includes Google Workspace, Polymarket Trade, Humanizer, PollyReach, and Agent Phone Call. Each tool gives your agent a new capability it did not have before.
Navigate to the Skills tab
Click "Skills" in the left sidebar. You will see the Skills Hub with three tabs at the top: Skillsets (1) showing the number 12 (the available packages), Installed (2) showing your currently active skills, and Discover (3) for browsing individual skills from ClawHub.
Browse the 12 role-based packages
The Skillsets tab shows 12 packages in a 3-column grid. The first row has Founder/CEO/Executive (1) with 23 skills, Sales/BizDev with 23 skills, and Marketing/Growth Lead with 24 skills. Each card shows the skill count, recommended memory stack (Executive, Technical, or Marketing), a preview of included tools like Google Workspace, Humanizer, PollyReach, and a red "Activate" button.
Activate a skillset
Each package card has a red "Activate" button at the bottom-right. Click it to install all the skills in that package. The tools will install one by one — installation typically takes 1-3 minutes. Once complete, your agent can use all of them immediately. The card also shows which memory stack works best (Executive, Technical, or Marketing).
Check installed skills
Click the "Installed" tab to see all currently active skills. If no skills are installed yet, you will see a message saying "No skills installed. Activate a skillset to get started." Once you activate a package, each skill appears here with its name, source package, and a remove button.
Try using a skill in conversation
Go back to the Chat tab and ask your agent to use one of its new skills. For example, if you installed the Software Engineer skillset, try: "Search GitHub for open issues in my repository" or "Help me review this pull request". The agent will use the appropriate skill automatically.
Browser Relay
Let your agent browse the web
Your agent has two ways to browse the web: a built-in Browser Harness that works instantly with no setup, or a Browser Relay that lets the agent control your own Chrome browser (useful when it needs access to your logged-in sessions). Most users can start with the built-in harness and switch to the relay later if needed.
Navigate to the Browser tab
Click "Browser" in the left sidebar. You will see the Browser page with a heading (1) "Give your agent browser access — built-in by default, or relay through your own Chrome." Below that are two cards side by side: Browser Harness (2) on the left and Browser Relay (3) on the right.
Browser Harness — the default (no setup needed)
By default, Browser Harness is active — shown with a green "Active" badge (1) inside the Harness card. Below the two cards, you will see the message "Browser Harness is active" (2) explaining that the agent has its built-in automation browser ready. Just ask the agent to open a webpage and it will spin up a tab and drive it automatically.
When to use Browser Relay instead
Switch to Browser Relay if you want the agent to control your own Chrome browser. This is useful when: the agent needs access to websites where you are already logged in (like email, CRM, or admin panels), you want to watch what the agent is doing in real time, or you need the agent to interact with sites that block automated browsers.
Click the Browser Relay card
To switch, click the "Browser Relay" card (1) on the right. The card will get a purple highlight border showing it is selected.
Confirm the switch
A confirmation dialog appears at the bottom: "Switch to Browser Relay?" (1). It explains that the agent will pair to your Chrome via the relay extension and its built-in browser will be turned off. Click the red "Switch" button (2) to confirm, or "Cancel" to stay on the harness.
The relay setup page
After switching, the Browser Relay card shows a green "Active" badge (1). Below the cards you will see three sections: CDP Relay Status (2) showing Browser and Agent connection state, Your Relay Token (3) — a masked string with copy and reset buttons, and 4-step Setup Instructions (4) for installing the extension.
Download and install the extension
In Step 1 of the setup instructions, click "Download Extension" to get the ZIP file. In Step 2, open chrome://extensions in your browser, enable "Developer mode" (toggle in top-right corner), click "Load unpacked", and select the extracted extension folder. The ClawBase extension icon will appear in your Chrome toolbar.
Copy your Relay Token and paste it in the extension
In the "Your Relay Token" section, click the "Copy token" button (1). The token is shown as dots for security. You can also click the eye icon (2) to reveal it, or the reset icon (3) to generate a new one. Then follow Step 3: right-click the extension icon in your toolbar, select "Options", paste the relay token, and click "Save".
Attach a browser tab
Follow Step 4: open a webpage (not the default new tab), then click the ClawBase extension icon to attach it. The extension will connect to the relay automatically. Once connected, the CDP Relay Status on the ClawBase page will show "Browser: Connected" and "Agent: Connected" in green.
Switch back to Browser Harness
To switch back, click the "Browser Harness" card. A similar confirmation dialog will appear — click "Switch" to go back to the built-in browser. Your relay extension will be disconnected but remains installed for next time.
Test the browser
Go to the Chat tab and ask your agent to browse a website. For the harness, try: "Open google.com and search for ClawBase". For the relay, navigate to a page first, attach the tab, then ask: "What is on the current page?". The agent will read the page content and respond.
Usage
Monitor your agent's consumption
Your agent consumes resources as it works — tokens (for thinking), storage (for memory), and compute (CPU and RAM on its VM). The Usage dashboard helps you understand and track this consumption so you can stay within your plan limits and optimize costs.
Navigate to the Usage tab
Click "Usage" in the left sidebar. You will see the Usage Dashboard with three sub-tabs at the top: LLM (1) for token usage (selected by default, shown in purple), Memory (2) for storage, and Resources (3) for VM compute.
The LLM tab — tokens and sessions
At the top, four dark cards show your totals: Input Tokens, Output Tokens, Cache Tokens, and Total Turns (1). Below those, two progress bars show Current Session (2) usage (e.g. 0 / 500,000) and Weekly Limits (3) (e.g. 0 / 5,000,000). Further down, a Daily Token Usage chart (4) shows input and output tokens for the last 30 days, and a Turns Per Day chart shows conversation activity.
The Memory tab — storage breakdown
Click the "Memory" sub-tab. At the top you will see the Memory Stack (1) showing active tools as green pills (e.g. "native", "lossless-claw") with a count like "2 tools, 1 skills". Below that, the Memory Storage bar (2) shows total usage against your budget (e.g. 161.6 MB / 7.82 GB). Then Memory Files count, and a Memory Storage Breakdown (3) listing per-component storage (Skills Files at 8.3 KB, Graphiti + Neo4j at 161.5 MB, etc.).
The Resources tab — VM compute
Click the "Resources" sub-tab. Four cards at the top show: CPU Cores (e.g. 4), RAM (e.g. 2.56 GB / 8.00 GB), CPU Usage (e.g. 11.5%), and Uptime (e.g. 1d 1h 28m). Below that, the CPU section (1) shows a progress bar and a 24-hour sparkline chart with blue bars. The RAM section (2) shows the same layout with purple bars. At the bottom, Root and Workspace disk partitions (3) show storage usage with progress bars.
Understanding plan limits
Your token limits depend on your subscription plan. The Pro plan includes approximately 500K tokens per session and 5M tokens per week. Max 5x multiplies these by 5, and Max 20x by 20. Cache tokens (repeated context from your conversation history) do not count toward these limits — only input and output tokens do.
Tips to reduce token usage
If you are approaching your limits: 1) Use Claude Sonnet instead of Opus for routine tasks (it uses fewer tokens). 2) Keep conversations focused — avoid very long back-and-forth sessions. 3) Start new sessions for unrelated topics instead of continuing one long conversation. 4) Use skills that work locally (like file operations) instead of making the agent reason about large documents.
AI Model
Configure your agent's AI brain
The AI Model configuration determines which "brain" your agent uses and whether it can search the web. With the Premium LLM add-on, you get unlimited usage with no API key required. You can also bring your own API key from any provider.
Navigate to the Model tab
Click "Model" in the left sidebar. You will see the AI Model page with two sections: AI Source (1) where you choose your model provider, and Advanced — Web Search (2) where you configure internet search capabilities.
Choose your AI source
Under AI Source, you have two options: Premium LLM Service (top-tier AI with unlimited usage, included with the Premium LLM add-on) and "Use your own API key" (bring your own key from Anthropic, OpenAI, or another provider). Most users should stick with the Premium LLM Service which is already selected and marked as "SUBSCRIBED".
Configure web search
Click "ADVANCED — WEB SEARCH" to expand the search configuration. You can choose from several providers: DuckDuckGo (no key needed — works out of the box), Brave Search, Tavily, Exa, Firecrawl, Perplexity Search, or SearXNG (self-hosted). DuckDuckGo is the default and requires no API key.
Search provider options
DuckDuckGo is free and works immediately with no setup. For more powerful search, you can use Brave Search (free tier: 2,000 searches/month), Tavily, Exa, Firecrawl, or Perplexity — these require pasting an API key from the respective provider. You can also set a Region (e.g. us-en, uk-en) and SafeSearch level (strict, moderate, or off).
Save your changes
After configuring your settings, click "Save Settings" to save your AI source choice, or "Save Search Config" to save your web search provider. Changes take effect on your agent's next response — you do not need to restart the agent. Go to the Chat tab and try asking a question that requires current information to verify web search is working.
Troubleshooting
Fix common issues
Most problems with your agent are self-healing — the system automatically recovers within a few minutes. If something seems wrong, check these common solutions before contacting support.
Agent not responding
If your agent is not replying to messages: check the status dot next to the agent name at the top of the page — it should be green. If it is yellow or gone, the agent may be restarting — wait 2-3 minutes. If it is still offline, click the "Reboot VM" button in the top-right corner (the first icon), wait 2-3 minutes for the restart to complete, then try sending a message again. If that does not work, try "Reinstall agent" (the second icon).
Telegram or Discord channel disconnected
If your Telegram or Discord bot stops responding: 1) Go to the Channels tab. 2) Check if the channel card shows a red status or error message. 3) Click "Reconnect" or "Reconfigure" on the channel card. 4) If that does not work, re-enter the bot token. 5) For Telegram, you may need to create a new bot via @BotFather if the old token was compromised.
WhatsApp keeps disconnecting
WhatsApp linked devices can disconnect if: your phone is offline for too long (14 days), WhatsApp updates its linking protocol, or the session expires. To fix: 1) Go to Channels > WhatsApp. 2) Click Reconnect. 3) Re-link the device by scanning the QR code or entering a new pairing code from your phone (WhatsApp > Linked Devices > Link a Device).
Memory seems outdated or missing information
If your agent does not remember something it should: 1) Check that the Memory Stack is active (Memory tab in sidebar should show green tools). 2) Memory syncs every 30 seconds via heartbeat — recently shared information may take a moment to be indexed. 3) The nightly 3 AM maintenance re-indexes all files and rebuilds the knowledge graph. 4) If memory is still missing, the agent may be online but the memory tools may have crashed — try restarting the agent.
High token usage or hitting limits
If you are consuming tokens faster than expected: 1) Go to Usage > LLM tab and check which sessions use the most tokens. 2) Long conversations with large context windows use the most tokens. 3) Switch to Claude Sonnet for routine tasks (it uses 3-5x fewer tokens than Opus). 4) Start new sessions for unrelated topics instead of one long conversation. 5) Cache tokens (shown separately) are free and do not count toward your limits.
Browser extension not connecting
If the browser extension will not connect: 1) Verify you are using Chrome, Edge, or Brave (not Firefox or Safari). 2) Check that Developer Mode is enabled on the chrome://extensions page. 3) Try removing and re-loading the extension. 4) Copy a fresh relay token from the ClawBase Browser tab (click the refresh icon next to the token). 5) Make sure your browser is not blocking the connection with an ad blocker or privacy extension.
Ready to run your own agent?
Spin up a fully managed OpenClaw instance in under 3 minutes.
Get Started